Vinyl – Before, During, & After Install
Get Ready for Your Beautiful New Vinyl Floor!
Imagine your dream vinyl floor – beautifully installed and ready to transform your home! To ensure a smooth process, minimize disruptions, and create a stress-free experience, review this guide to prepare for your vinyl installation. Here, we'll outline everything you need to know before the installers arrive.
Our first tip is about who should do the installation.
Now, you may be wondering if you could install your vinyl floor. Well, allow us to answer that right up front. That way you can be assured of a beautiful, efficient and correct installation. However, while installing vinyl flooring is a skill that is developed through years of experience, your understanding of the basics of installation will increase your knowledge of the process, and enhance your confidence in the professionals working in your home.
To begin, the installers get to the bottom of things.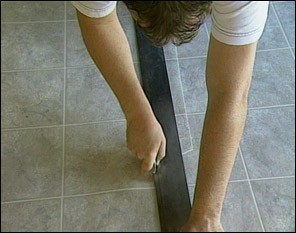
As with most flooring products, the first step is to prepare the substrate, the surface on which the vinyl flooring will be laid. If installing over a wood substrate, an underlayment will generally be necessary. Installing over a concrete substrate will not require an underlayment but will require some floor preparation. You will need to give attention to the height of your appliances to counters and cabinets if an underlayment is required.
Can you install new vinyl flooring over existing vinyl flooring? In some cases, yes. This is where employing qualified flooring professionals really pays off. They can determine if your existing vinyl flooring is acceptable or if it will need to be removed.
Vinyl Flooring Installation Methods:
- Full Spread: Adhesive is troweled over the entire substrate for a strong, permanent bond.
- Perimeter Adhered: Adhesive is applied only around the perimeter and seams for a secure installation.
- Floating: Vinyl flooring planks click together and lay loosely on the subfloor without adhesive.
We will use the most appropriate method based on your specific vinyl flooring and subfloor conditions.
What to know and do before installation day:
Your furniture is priority one.
Remove all furniture and other objects and materials from the areas where the installation will take place. Some installers will move your furniture, but there may be an additional charge for doing so. Before moving, you’ll also need to empty the contents of china cabinets, closets and the like. Be aware that the area of installation must be climate controlled. Indoor humidity should be maintained between 45-65%.
Make a decision on your old floor covering.
Please consider how your old floor covering will be taken up and disposed of. This can be a time-consuming task. We recommend that you check with us about the cost and the method of disposal. If you prefer to remove your present floor covering, do it at least one day prior to arrival of your vinyl product to allow for cleanup and floor preparation. If removing old carpet, please pull the staples out of the floor from the original pad.
What’s to be done with the trim?
In many cases, shoe molding or quarter round need to be removed for vinyl installation. Your installer may do this but at an additional charge and they will not be responsible for damage or breakage due to dry or brittle wood. Painted baseboards, woodwork and paint may need retouching after the installation is complete. If necessary, this is your responsibility.
Get in the know about the clean-up.
Installing new vinyl will produce waste. Usually these materials are collected by your installer and left at your trash collection site or taken back to the store for disposal. If you would like the remnants, please advise your salesperson, and we will leave them at your home for you.
What to know and do during installation day:
Be home on the big day.
Be prepared to be at home or available by phone the day of installation in case the installation crew has questions. Because it is difficult to estimate the length and circumstances of each job, we may not be able to give you an exact time of arrival.
Keep safety top of mind.
Your installers will use a variety of tools and techniques that can make the work area hazardous. Please make sure that your children and pets are kept out of the work area on installation day.
What to know and do after installation day:
For a minimum of 24 hours after your new vinyl floor is installed, protect all the seamed areas, don’t walk on them or the seam sealer. Keep the room at 68° F or greater for at least 2 days after installation to allow the adhesives to set up properly. If you are sensitive to dust and odors, good ventilation should be established for 48 to 72 hours after installation.
- When you are ready to move appliances back into the room, an underlayment type of product such as plywood or particleboard with a minimum thickness of 3/8” placed on the new flooring prior to moving the appliances, will greatly reduce any mishaps. Do not rely on the wheels that may be attached to the refrigerator to move the appliance back in, as they can cause damage to the new floor.